
We know you’re in a hurry! To make it easier for you, we’ve put together the
shortest route to navigate your way around Inhouse Cloud Accounting.
Inhouse Cloud Accounting Welcome Guide
Navigating Inhouse Cloud Accounting
Before we get into the specifics, see where you’ll find what.
1. The Navigation Panel on the left-hand side lists all the modules of Inhouse Cloud Accounting System.
2. Get into the Customers to create, manage and view customers and customer statements.
3. Get into the quotations tab to create, view, edit print and email quotations.
4. Get into the invoices tab to create, view, edit, sort, print and email quotations
5. Get into the payments tab to enter payments, print and email payment receipts.
6. Use the the inventory and non-inventory tabs to list the goods and services you offer, their prices and stock levels.
7. Get into the suppliers to create, manage and view suppliers and customer statements.
8. Click on the orders tab to create, edit and email LPO’s
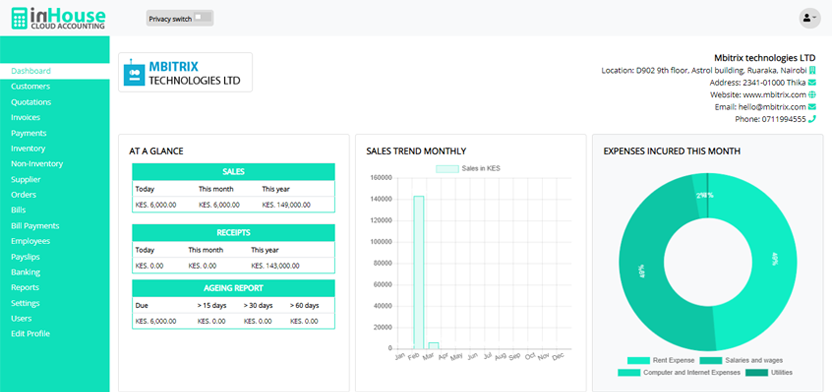
9. Use the tabs bills and bill payments to create, manage and pay your bills
10. Click on the employees and payroll tab to manage your employees and generate payroll.
11. Use the banking tab to manage your cash and bank accounts and their related transactions.
12. Click on the Reports tab to view your business financial reports
13. Click on the Settings tab to manage your Organization Profile, letterheads, Tax codes, Users, Subscriptions and more.